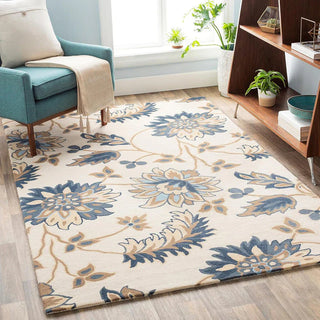
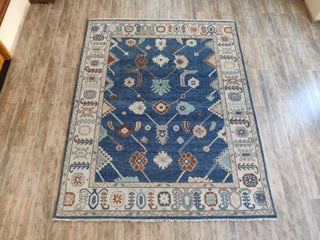

Buying rugs online opens up a world of options, from plush area rugs to wall-to-wall carpets, all available with a few clicks. However, once you’ve chosen your perfect carpet and hit “purchase,” the next big step is installation. Whether it’s a new carpet for your living room or a runner for your hallway, understanding the carpet installation process will help you prepare and ensure the best results.
This guide covers everything you need to know about carpet installation, including the types of installation, preparation tips, what to expect during the process, and how to maintain your carpet afterward. Armed with this knowledge, you can confidently buy rugs online and enjoy a smooth installation experience.
Why Understanding Carpet Installation Matters
Installing a carpet correctly is just as important as selecting the right style and material. Proper installation:
-
Ensures your carpet looks smooth and professional
-
Maximizes the lifespan of your carpet
-
Prevents premature wear, wrinkles, and damage
-
Improves safety by reducing tripping hazards
Being informed about the installation process empowers you to ask the right questions, prepare your home properly, and set realistic expectations.
Types of Carpet Installation
There are several methods of installing carpets, each suited to different rug types and rooms:
1. Stretch-In Installation
This is the most common method for wall-to-wall carpeting in residential spaces. It involves stretching the carpet over a carpet pad, then securing it to tack strips installed around the room’s perimeter.
-
How it works: Tack strips are nailed around the edges of the room, carpet padding is laid down, and the carpet is stretched and fastened to the strips.
-
Best for: Wall-to-wall carpet installations in bedrooms, living rooms, and offices.
-
Benefits: Provides cushioning, extends carpet life, and allows for easier replacement.
2. Glue-Down Installation
Glue-down involves adhering the carpet directly to the subfloor using strong adhesives. This method is common in commercial settings and for carpets that don’t have a backing suitable for stretching.
-
How it works: Adhesive is spread on the subfloor, and the carpet is carefully rolled and pressed into place.
-
Best for: Commercial spaces, stairs, and some synthetic carpets or carpet tiles.
-
Benefits: Creates a firm, flat surface and is durable in heavy traffic areas.
3. Loose Lay or Floating Rugs
Some large area rugs or runners are installed loosely without adhesives or tack strips. These rugs rely on their weight and rug pads to stay in place.
-
Best for: Area rugs, runners, and temporary installations.
-
Benefits: Easy to remove and reposition, ideal for renters or seasonal changes.
Preparing for Carpet Installation
Preparation is key to a smooth installation:
Clear the Space
Remove all furniture, appliances, and personal items from the room. This allows installers easy access and ensures nothing gets damaged during the process.
Inspect the Subfloor
A clean, dry, and level subfloor is essential for a successful installation. If you’re installing wall-to-wall carpet, ask your installer to check the floor for imperfections or moisture issues that might require repairs or treatment.
Choose the Right Carpet Pad
If installing wall-to-wall carpet, the padding beneath affects comfort, durability, and insulation. Discuss padding options with your carpet supplier or installer — higher-density pads offer more cushioning and longevity but come at a higher cost.
Plan Your Timeline
Schedule installation when you can leave the room undisturbed for at least 24-48 hours. This allows adhesives or padding to settle and ensures the best carpet appearance.
The Carpet Installation Process: Step-by-Step
Here’s what typically happens during carpet installation:
1. Measurement Verification
Installers will double-check room dimensions and carpet size to ensure a perfect fit.
2. Removing Old Flooring (If Applicable)
If replacing old carpet, installers will remove it along with the existing padding and prepare the subfloor.
3. Installing Tack Strips and Padding
For stretch-in installations, tack strips are nailed around the room’s perimeter, leaving a small gap from the walls. Carpet padding is then laid over the subfloor and secured.
4. Laying Out the Carpet
The carpet is unrolled and cut to fit the room shape, allowing for trimming around doorways and obstacles.
5. Stretching the Carpet
Using power stretchers and knee kickers, the carpet is stretched over the padding and secured to the tack strips. This step ensures a smooth, wrinkle-free surface.
6. Seaming (If Needed)
If your carpet requires multiple pieces, installers will carefully seam the edges using special adhesives or tapes to create an almost invisible join.
7. Trimming and Finishing
Excess carpet is trimmed along edges, and transitions to other flooring types are installed for a clean finish.
8. Cleanup and Inspection
The installation team cleans the area and inspects the carpet for any imperfections or loose areas.
What to Expect After Installation
-
Odor: New carpets may emit a mild “new carpet” smell for a few days. Open windows and ventilate the space to speed up the process.
-
Settling: Allow 24-48 hours before heavy foot traffic to let adhesives and padding settle.
-
Appearance: The carpet should be smooth without wrinkles or bubbles. Minor wrinkles may appear but typically disappear after settling.
-
Cleaning: Vacuum gently after installation to remove loose fibers.
Common Carpet Installation Challenges
-
Poor Subfloor Conditions: Moisture or uneven floors can cause problems. Address these before installation.
-
Improper Padding: Low-quality padding can lead to early wear or uneven feel.
-
Incorrect Stretching: Insufficient stretching leads to wrinkles or buckling. Always use experienced installers.
-
Inaccurate Measurements: Mistakes can cause visible seams or carpet gaps.
Maintaining Your Newly Installed Carpet
Proper care extends your carpet’s life:
-
Vacuum regularly to prevent dirt buildup.
-
Address spills immediately to avoid stains.
-
Schedule professional deep cleaning every 12-18 months.
-
Use furniture pads to prevent dents.
-
Rotate rugs occasionally to balance wear.
Why Buy Rugs Online from Carpet Planet?
When you buy rugs online with Carpet Planet, you get access to:
-
Expert advice on carpet types and installation methods.
-
Detailed product information to match your room size and style.
-
Trusted delivery and professional installation recommendations.
-
Customer support to guide you from selection through installation.
Conclusion
Understanding carpet installation makes buying rugs online less intimidating and more rewarding. Whether you choose wall-to-wall carpeting or an area rug, knowing the types of installation, preparation steps, and what to expect ensures your new carpet looks perfect and lasts for years. With Carpet Planet’s quality products and expert support, your next carpet installation will be a smooth and successful experience.
Frequently Asked Questions (FAQs)
1. Do I need to hire professional installers when I buy rugs online?
While small area rugs can be placed easily, professional installation is recommended for wall-to-wall carpets to ensure a flawless fit and finish.
2. How long does carpet installation typically take?
Most residential installations take a few hours to a day, depending on room size and complexity. Larger or multiple rooms may require more time.
3. Can I install carpet myself after buying rugs online?
DIY installation is possible for small rugs and runners, but wall-to-wall carpeting requires special tools and experience for best results.
4. What should I do to prepare my home for carpet installation?
Clear the room of furniture, clean the subfloor if possible, and plan for ventilation after installation.
5. How soon can I walk on the carpet after installation?
Wait 24 to 48 hours before heavy use to allow adhesives and padding to settle, especially for glue-down installations.